``
Hello and welcome to week 4 of ESPM 112L-
Metagenomic Data Analysis Lab!
This week’s lab is one of the most fun of the semester- you all are going to get to do some manual binning with our lab’s tool, ggKbase!
ggKbase is a spectacular way to visualize the ways we separate out genomes from metagenomes, and unlike automatic binning software, you can see and control the whole process!
Similar platforms like Anvi’o (https://merenlab.org/software/anvio/) are available for manual binning, although slightly different from what you’ll be using today.
What is binning?
Remember, we start with a whole community of microorganisms, so we have DNA from multiple origin genomes.
The assembler, as you’ll recall from last week, does a pretty good job of piecing these things together, but we’re still left with fragments of these original genomes.
Binning is the process of choosing which of these fragments likely originated from the same genome, and stitching them together into genome bins (sometimes called MAGs, or Metagenome-Assembled Genomes, in the literature).
Each group will be binning their own sample this week, and this document will show you how.
ggKbase
ggKbase is our lab’s platform for metagenomic data analysis. Head on over to https://class.ggkbase.berkeley.edu; we’re going to make each of you an account.
When you get to the homepage, go to the top right and click “Create an account”. (Ctrl+F if you can’t find it.) Here’s what you should see:

Please sign up with your first initial and your last name so I can find you, since I need to give you each access to your sample individually (and I need to find your name!).
In the meantime, let’s go over binning principles.
Navigating ggKbase
I’m going to start with an example project and show you how to bin it; we’ll have a demo also during class from Jill, who’s the absolute expert on manual binning with ggKbase- pay close attention to how she does it!
Let’s start by going to the Projects page, which you can access with the button on the top left (ctrl+F “projects” if you can’t find it) - you probably won’t see anything until I give you access to your team’s sample. Here’s what I see (I have access to all the projects as the class instructor):

Let’s select our example project - this sample isn’t assigned to any team, so don’t get confused and try to find it! None of you will have access to this one.
Binning
Once you click on the name of the sample, you’ll see this page:
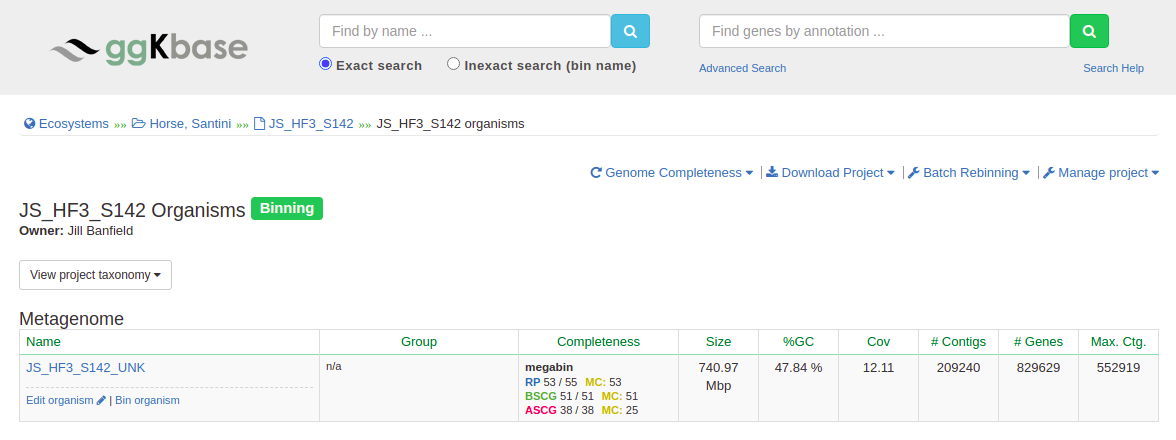
Click “Bin organism” to get started.
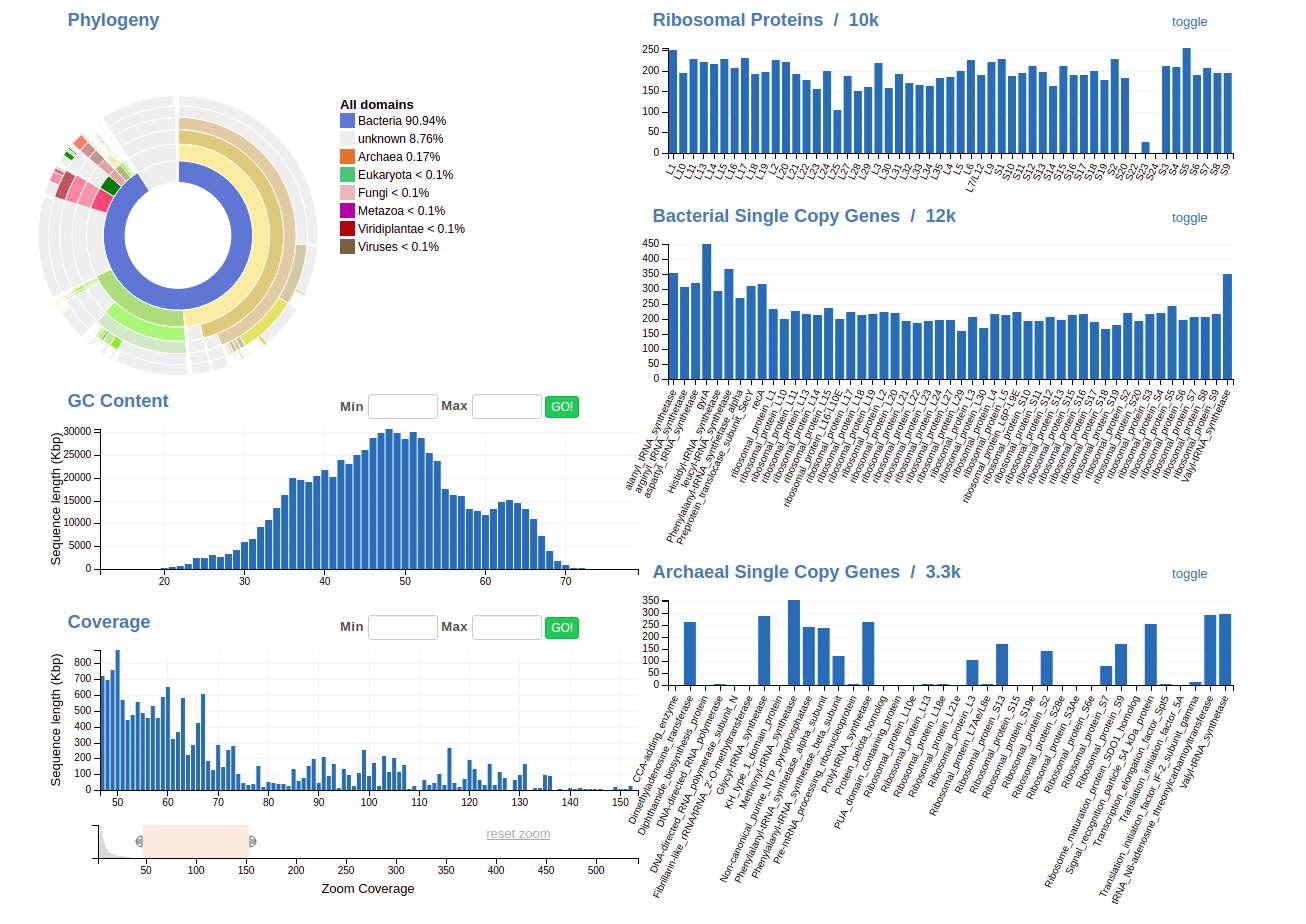
Binning involves using all of this information to separate out genomes; here’s what all of these features mean.
Feature types
There are three features to select from when binning: Taxonomy, GC content, and coverage.
There are three more boxes on the right-hand side, too:
- Ribosomal proteins (you want one copy of as many as you can get; duplicates are bad but not the end of the world)
- Bacterial single-copy genes (SCGs)- as the name implies, you also want one copy of as many as you can get.
- Archaeal SCGs - You won’t find many of these in your samples, but if you were looking for Archaea, you’d treat them the same as bacterial SCGs.
If you get an ideal bin, the taxonomy wheel should show a consistent color and you should have one copy of (most of) the ribosomal proteins and bacterial SCGs.
Taxonomy
The Taxonomy wheel in this case displays the “consensus taxonomy” of a contig. It looks like this:

From the innermost ring, each ring represents, in order, Domain, Phylum, Class, Order, Family, Genus and Species. Each group is color-coded for easy navigation- as you get more used to it, you’ll start finding this scheme very convenient to visualize who’s living in your sample.
Essentially, we search every protein sequence against a huge database, and label each protein with the taxonomic ID of the best hit in the database. So if we searched, say, a DNA Polymerase subunit against our database and it came back with its best hit as an E. coli, that protein would be labeled
Bacteria -> Proteobacteria -> Gammaproteobacteria -> Enterobacterales -> Enterobacteraceae -> Escherichia -> Escherichia coli
When we say a ‘contig’ (here we use the term interchangeably with ‘scaffold’) has a certain taxonomy, that means more than 50% of the proteins on that contig share taxonomy at that level. For example, if the rest of the contigs on our imaginary example contigs only had hits from other Enterobacterales but not from Enterobacteraceae or lower divisions, the contig would show up as Enterobacterales.
You can use this wheel to select contigs that share taxonomic affiliation. Try clicking around to see what’s going on; remember there’s a grey ‘reset’ button that will remove your selection and take you back.
GC Content
GC Content is one of the best ways to separate genomes from a sample. Here’s what it should look like before you do anything:
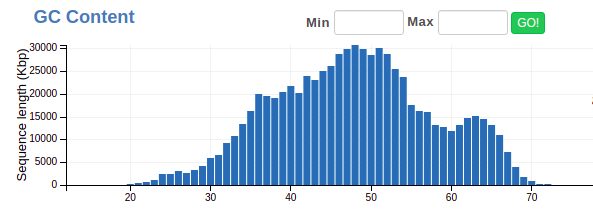
Now, when you make a selection in other feature types (like coverage or taxonomy) you’ll see the distribution change here; in this example I’ve selected all the contigs with a coverage value between 60 and 80.
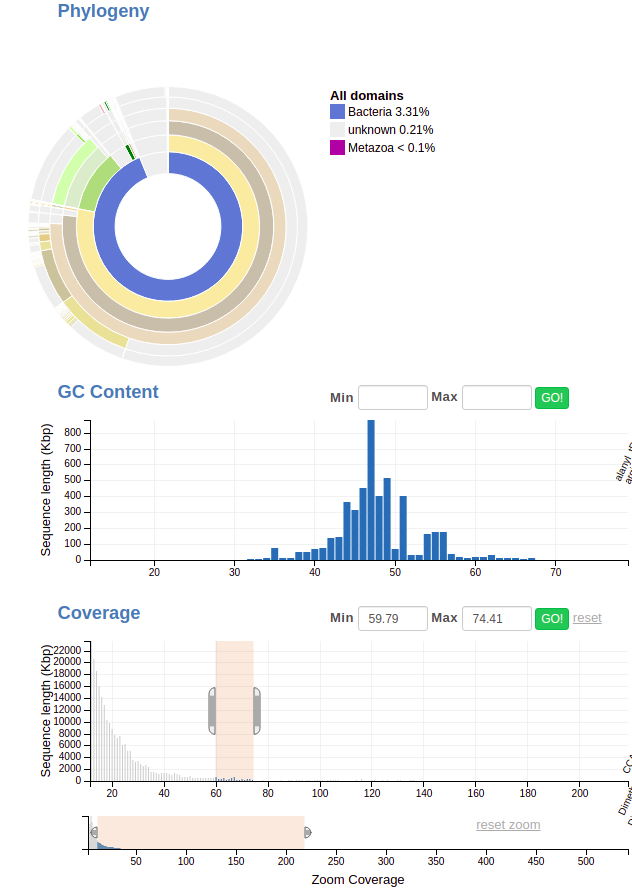
Notice how the GC content now has a spike at around 47 and another at ~55? See also how the taxonomy wheel has changed; how it’s mostly beige (the phylum Bacteroidetes) with a little bit of green (Firmicutes).
Let’s try selecting that second GC content spike and see what happens:

Would you look at that! See how there’s one copy of all those ribosomal proteins and single-copy genes? That’s an indicator of a pretty good genome. This is a pretty good summary of what you need to do
Coverage
Coverage, remember, is how many reads align to each position (on average) across a contig/scaffold. For organisms that were more abundant in the original community, we generally observe higher coverage for their genomes- it’s a good way to tell what the composition is of your community/sample.
It’s also a great way to separate bins out!
Here’s what the coverage bar looks like:
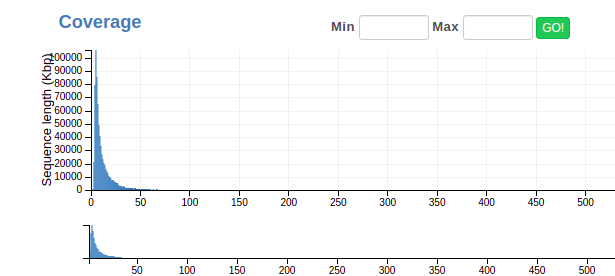
You’ll notice it’s pretty hard to see any pattern that might correspond to an individual genome, since most contigs have pretty low coverage. (That’s normal!) To get around this, we use the lower of the two bars to zoom in, like so:
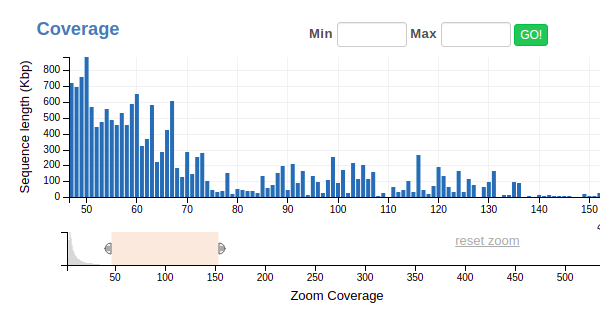
Now you can make more refined selections on the upper bar- look for spikes, similar to what we did with the GC content example above.
Finalizing a Bin
Once you’ve got a good bin selected, we’re going to want to finalize the bin. Go to the lower right-hand corner where it says “Manipulate selected contigs”, and fill out the bin name (if it doesn’t fill automatically), then press “Create a new bin”. Here’s what it looks like:
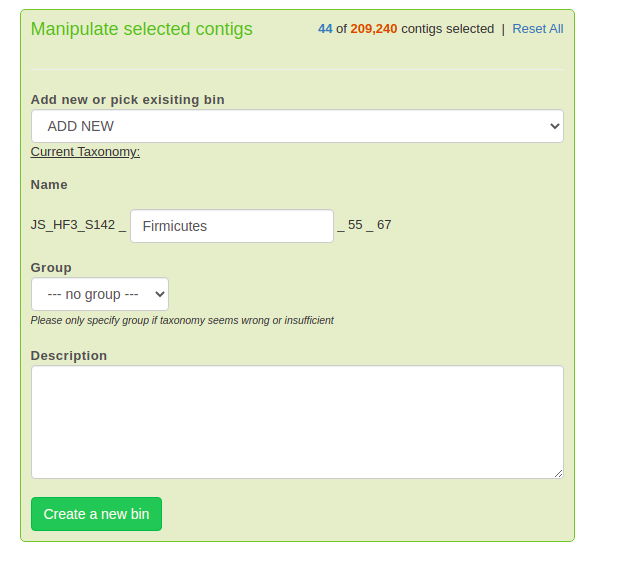
Then go back, reset your selection criteria, and repeat until you can’t find any more good bins! (Or until you’re satisfied!)
Intepreting ggKbase annotation data
Let’s look at one of our scaffolds. On your binning page, scroll down until you see a table with scaffolds, coverage, GC content, and length. You might want to order the scaffolds by length, which you can do by clicking the two little arrows right next to ‘DNA length’, like so:
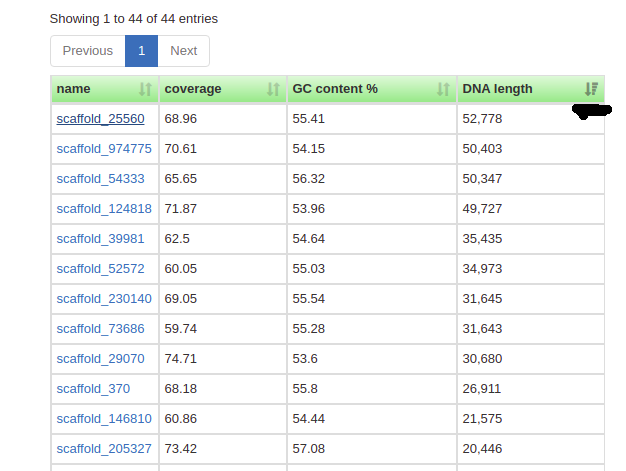
Now click on one of your contigs, and let’s see what we have going on. Here’s the longest contig in the example bin I made in the GC content section:

Now you can see some important info for this contig:
- It’s from a Clostridiales bacterium in the phylum Firmicutes.
- It’s 52,778 bp long. (Not very long in the grand scheme of things!)
- It’s at ~70x coverage- that means on average, 70 reads align to any given position on this contig. That’s quite good- it’s also why this genome was so easy to pull out.
- You can scroll down and see the annotations for the individual proteins- look in your bins to see if you can find anything interesting!
Bonus: Viruses and Bacteriophage
Now these aren’t the organisms you’re necessarily looking for today, but you will probably find a couple of them as you go through your data. The way we spot phages is by looking for a couple types of key features in the annotations (so you’re going to have to look at the contigs to find this info):
- Structural proteins - they’re often annotated as capsid, tail, or head proteins. These form the protein shell- the capsid- of a bacteriophage.
- Transposon-like proteins- these are proteins that allow for genetic regions to lift up and out of a genome, then integrate somewhere else. You’ll see keywords like “Transposable element” or “integrase”. Obviously pretty important if you’re a virus and you want your DNA to integrate into your host’s genome as a prophage!
- Lots and lots of hypothetical proteins, and proteins with no informative annotation. Viral proteins evolve very quickly, and it’s difficult to tell what they’re doing based on sequence data alone a lot of the time.
Today’s Turn-In
-
Create at least five bins for your sample. Send me the taxonomy of the longest contig for each.
-
How many scaffolds are there with a coverage above 200 and below 300 in your sample?
-
What is the most abundant bacterial phylum in your sample? How many bins did you recover from that phylum?
-
Optional- Find a phage!